|
|
|
| SUBMIT your Email Address to JOIN the FREE T-Shirt Newsletter and get FREE T-Shirts & other Free Stuff offers daily |

Making A Plaid Tile Tutorial
in Paint Shop Pro
Open a new transparent image, width 10 height 100. Choose a foreground
color and fill using fill bucket
.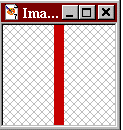
Change the background color in the color selector to another color of
your choice, then click image/add borders, Symmetric unchecked, make all borders 0 except
for right which you will set at 10 as in image below.
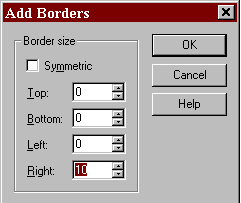
Click ok. You should have two stripes similar to the image below with colors of your choice.
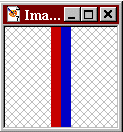
Continue to change your background color and add right border of 10 until
your picture size is increased to 100x100.
You should end up with an image similar to this one but with the colors of your choice
.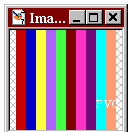
Click on window/duplicate. . On one image click on image/rotate/90
degrees, left or right.Click on the layers palette and pull the slider down to 50.
Click on image/copy, then select the other image. Click on image/paste/as new layer.
Your image should look like this.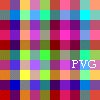 Click on
layers/merge/visible and save, the images are automatically seamless..
Click on
layers/merge/visible and save, the images are automatically seamless..
Click on the image to see it tiled.
 On this image notice I made the right borders in different
sizes.
On this image notice I made the right borders in different
sizes.
I selected the original image 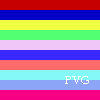 from the above tutorial and
rotated it 90 degrees. I did the copy/paste and pasted it on the image with the
wider borders with this result
from the above tutorial and
rotated it 90 degrees. I did the copy/paste and pasted it on the image with the
wider borders with this result 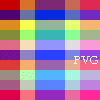 Click on this image to
see it tiled.
Click on this image to
see it tiled.
I resized the above image to 50x50 click on image to see it tiled in the smaller size.
For this tile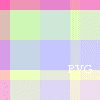 I made both images using
pastel colors. Click on image to see it tiled.
I made both images using
pastel colors. Click on image to see it tiled.
Another plaid tile 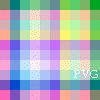 Click on image to
see it tiled.
Click on image to
see it tiled.
The finished images are automatically seamless tiles.
INL

ENJOY!!!!!
![]()
Tutorial copyright 2000, Plain Vanilla Graphics